You’ve already learned about the <video> and <canvas> elements, but did you know that they were designed to be used together? In fact, the two elements are absolutely wondrous when you combine them! I’m going to show off a few super-simple demos using these two elements, which I hope will prompt cool future projects from you fellow web authors. (All of these demos work in every modern browser except Internet Explorer.)
First, the basics
If you’re just starting with HTML5, you may not be familiar with the <video> element and how to use it. Here’s a simple example that we’ll be using in the later demos:
<video controls loop>
    <source src=video.webm type=video/webm>
    <source src=video.ogg type=video/ogg>
    <source src=video.mp4 type=video/mp4>
</video>
The <video> element contains two attributes: @controls and @loop. @controls tells the browser to give the video the standard set of video controls: play/pause, scrubber, volume, etc. @loop tells the browser to start the video over again from the beginning once it ends.
Then, inside the <video> element, we have three child <source> elements, each pointing to a different encoding of the same video. The browser will try each source in order and play the first one that it understands.
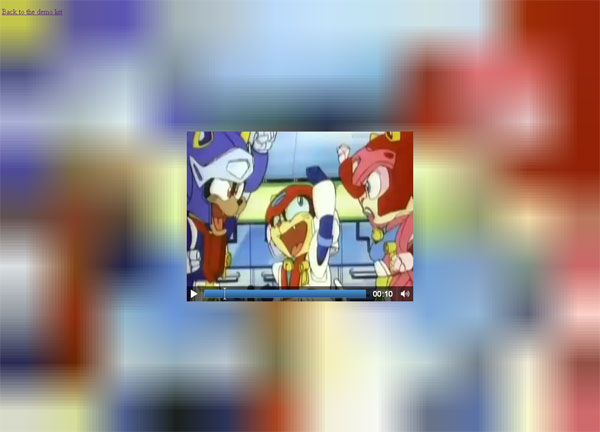
See this code in action, playing the intro to one of the greatest cartoon series of all time.

(A note about fallback: all of these demos assume that your browser has <video> support, which isn’t true in IE8 or earlier. Normally, it’s good practice to specify a Flash fallback or similar for those browsers, but that wouldn’t accomplish much here — all of the techniques I demonstrate rely on basic integration between the <video> element and the <canvas> element, which you can’t achieve with a Flash player. So I’ve omitted any non-<video> fallback content in these examples. I’ve still provided multiple sources, though, so all current browsers that do support <video> will be able to play it.)
Now, a simple example
Now that we know how to play a video, let’s mix in some <canvas> shenanigans. First, check out the demo, then come back here for a code walkthrough. I’ll wait.
…
Done? Cool! Now, how does this work? Surely it requires a few hundred lines of JavaScript, right? If you’ve cheated and already looked at the source code of the demo page, you’ll know how easy it is.
We start with this HTML:
<!DOCTYPE html>
<title>Video/Canvas Demo 1</title>

<canvas id=c></canvas>
<video id=v controls loop>
    <source src=video.webm type=video/webm>
    <source src=video.ogg type=video/ogg>

    <source src=video.mp4 type=video/mp4>
</video>
Same video code as before, but now with a <canvas> element thrown into the mix. Kinda empty and useless at the moment, though. We’ll script it into action later.
Now, let’s pair that with some CSS to get things positioned right:
<style>

body {
    background: black;
}

#c {
    position: absolute;
    top: 0;
    bottom: 0;
    left: 0;
    right: 0;
    width: 100%;
    height: 100%;
}

#v {
    position: absolute;
    top: 50%;
    left: 50%;
    margin: -180px 0 0 -240px;
}
</style>
This just centers the video in the screen and stretches the canvas to the full width and height of the browser window. Since the canvas comes first in the document, it’ll be behind the video, exactly where we want it.
Now, here comes the magic!
<script>
document.addEventListener('DOMContentLoaded', function(){
    var v = document.getElementById('v');
    var canvas = document.getElementById('c');
    var context = canvas.getContext('2d');

    var cw = Math.floor(canvas.clientWidth / 100);
    var ch = Math.floor(canvas.clientHeight / 100);
    canvas.width = cw;
    canvas.height = ch;

    v.addEventListener('play', function(){
        draw(this,context,cw,ch);
    },false);

},false);

function draw(v,c,w,h) {
    if(v.paused || v.ended) return false;
    c.drawImage(v,0,0,w,h);
    setTimeout(draw,20,v,c,w,h);
}
</script>
Take that in for a moment. Just breathe deeply and absorb it. So short, so sweet, so pretty…
Now, let’s step through it.
    var v = document.getElementById('v');
    var canvas = document.getElementById('c');
    var context = canvas.getContext('2d');

    var cw = Math.floor(canvas.clientWidth / 100);
    var ch = Math.floor(canvas.clientHeight / 100);
    canvas.width = cw;
    canvas.height = ch;
This part is simple. I grab hold of the video and canvas elements on the page, and I grab the canvas’s 2D-context so I can draw on it. Then I do some quick calculating to find out how wide and tall I want the canvas’s drawing surface to be. The <canvas> element itself is already stretched to the size of the screen via CSS, so this’ll make each pixel of the drawing surface equal to about 100×100 pixels on the screen.
That last bit may need some explanation if you’re new to canvas. Normally, the visual size and the drawing-surface size of a <canvas> element will be the same. In that case, drawing a line 50px long will display a line 50px long. But that doesn’t have to be true — you can set the drawing surface’s size through the @width and @height properties on the <canvas> element itself, and then change the visual size of the canvas with CSS to be something different. The browser will then automatically upscale or downscale the drawing appropriately to make the drawing surface fill the visual size. In this case, I’m setting the drawing surface of the canvas to be very small — on most screens, it’ll be about 10px wide and 7px tall — and then stretching the visual size with CSS so that each pixel I draw gets blown up 100-fold by the browser. That’s what causes the cool visual effect in the demo.
    v.addEventListener('play', function(){
        draw(v,context,cw,ch);
    },false);
Another simple part. Here I attach some code to the “play” event on the video element. This event gets fired whenever the user hits the “play” button to start watching the video. All I do is call the draw() function with the appropriate parameters: the video itself, the canvas’s drawing context, and the canvas’s width and height.
function draw(v,c,w,h) {
    if(v.paused || v.ended) return false;
    c.drawImage(v,0,0,w,h);
    setTimeout(draw,20,v,c,w,h);
}
The first line just makes the function stop immediately if the user pauses or stops the video, so it’s not burning CPU when nothing’s changing. The third line calls the draw() function again, allowing the browser a little breathing space to do other things like update the video itself. I’m putting in a 20ms delay, so we’ll get roughly 50fps, which is more than enough.
The second line is where the magic happens — it draws the current frame of the video directly onto the canvas. Yes, it’s exactly as simple as it looks. Just pass the video element and the x, y, width, and height of the rectangle on the canvas you want it to draw into. In this case, it’s filling up the entire canvas, but you could do less (or more!) if you wanted.
I’m using another trick here. Remember how the canvas is really tiny? The video will be at least 20 times bigger than the canvas on most screens, so how do we draw it onto such a tiny canvas? The drawImage() function handles that for us — it automatically scales whatever you hand it in the first argument so that it fills the rectangle you specify. That means we authors don’t have to worry about averaging the pixel colors (or extrapolating, if you’re drawing a small video into a big rectangle) because the browser does it all for us. I’ll use this trick more in the future, so watch out for it.
And…that’s it! The entire demo is done in 20 lines of easy-to-read JavaScript code, instantly producing a nifty background effect for any video you wish to play. You can trivially adjust the size of the “pixels” on the canvas by adjusting the lines that set the cw and ch variables.
Directly manipulating video pixels
The last demo was cool, but it just let the browser do all the heavy lifting. The browser downscaled the video, drew it onto the canvas, and then upscaled the canvas pixels, all automatically. Let’s try our hand at doing some of this ourselves! Check out the demo to see this in action, where I convert the video to grayscale on the fly.

The HTML for the page is basically identical:
<video id=v controls loop>
    <source src=video.webm type=video/webm>
    <source src=video.ogg type=video/ogg>
    <source src=video.mp4 type=video/mp4>
</video>
<canvas id=c></canvas>
Nothing new here, so let’s move onto the script.
document.addEventListener('DOMContentLoaded', function(){
    var v = document.getElementById('v');
    var canvas = document.getElementById('c');
    var context = canvas.getContext('2d');
    var back = document.createElement('canvas');
    var backcontext = back.getContext('2d');

    var cw,ch;

    v.addEventListener('play', function(){
        cw = v.clientWidth;
        ch = v.clientHeight;
        canvas.width = cw;
        canvas.height = ch;
        back.width = cw;
        back.height = ch;
        draw(v,context,backcontext,cw,ch);
    },false);

},false);

function draw(v,c,bc,w,h) {
    if(v.paused || v.ended) return false;
    // First, draw it into the backing canvas
    bc.drawImage(v,0,0,w,h);
    // Grab the pixel data from the backing canvas
    var idata = bc.getImageData(0,0,w,h);
    var data = idata.data;
    // Loop through the pixels, turning them grayscale
    for(var i = 0; i < data.length; i+=4) {
        var r = data[i];
        var g = data[i+1];
        var b = data[i+2];
        var brightness = (3*r+4*g+b)>>>3;
        data[i] = brightness;
        data[i+1] = brightness;
        data[i+2] = brightness;
    }
    idata.data = data;
    // Draw the pixels onto the visible canvas
    c.putImageData(idata,0,0);
    // Start over!
    setTimeout(function(){ draw(v,c,bc,w,h); }, 0);
}
The script is a bit longer this time, because we’re actually doing some work. But it’s still really simple!
document.addEventListener('DOMContentLoaded', function(){
    var v = document.getElementById('v');
    var canvas = document.getElementById('c');
    var context = canvas.getContext('2d');
    var back = document.createElement('canvas');
    var backcontext = back.getContext('2d');

    var cw,ch;

    v.addEventListener('play', function(){
        cw = v.clientWidth;
        ch = v.clientHeight;
        canvas.width = cw;
        canvas.height = ch;
        back.width = cw;
        back.height = ch;
        draw(v,context,backcontext,cw,ch);
    },false);
This is almost the same as I had before, with two real differences.
First, I’m creating a second canvas and pulling the context out of it as well. This is a “backing canvas”, which I’ll use to perform intermediate operations before painting the final result into the visible canvas in the markup. The backing canvas doesn’t even need to be added to the document. It can just hang out here in my script. This strategy will be used a lot in later examples, and it’s quite useful in general, so take note of it.
Second, I’m waiting to resize the canvases until the video is played, rather than just sizing them immediately. This is because the <video> element probably hasn’t loaded its video up when the DOMContentLoaded event fires, so it’s still using the default size for the element. By the time it’s ready to play, though, it knows the size of the video and has sized itself appropriately. At that point, we can set up the canvases to be the same size as the video.
function draw(v,c,bc,w,h) {
    if(v.paused || v.ended) return false;
    bc.drawImage(v,0,0,w,h);
Same as the first demo, the draw() function begins by checking if it should stop, then just draws the video onto a canvas. Note that I’m drawing it onto the backing canvas, which, again, is just sitting in my script and isn’t displayed in the document. The visible canvas is reserved for the displaying the grayscale version, so I use the backing canvas to load up the initial video data.
    var idata = bc.getImageData(0,0,w,h);
    var data = idata.data;
Here’s the first new bit. You can draw something onto a canvas with either the normal canvas drawing functions or drawImage(), or you can just manipulate the pixels directly through the ImageData object. getImageData() returns the pixels from a rectangle of the canvas. In this case, I’m just getting the whole thing.
Warning! If you’re following along and trying to run these demos on your desktop, this is where you’ll probably run into trouble. The <canvas> element keeps track of where the data inside of it comes from, and if it knows that you got something from another website (for example, if the <video> element you painted into the canvas is pointing to a cross-origin file), it’ll “taint” the canvas. You’re not allowed to grab the pixel data from a tainted canvas. Unfortunately, file: urls count as “cross-origin” for this purpose, so you can’t run this on your desktop. Either fire up a web server on your computer and view the page from localhost, or upload it to some other server you control.
    for(var i = 0; i < data.length; i+=4) {
        var r = data[i];
        var g = data[i+1];
        var b = data[i+2];
Now, a quick note about the ImageData object. It returns the pixels in a special way in order to make them easy to manipulate. If you have, say, a 100×100 pixel canvas, it contains a total of 10,000 pixels. The ImageData array for it will then have 40,000 elements, because the pixels are broken up by component and listed sequentially. Each group of four elements in the ImageData array represent the red, green, blue, and alpha channels for that pixel. To loop through the pixels, just increment your counter by 4 every time, like I do here. Each channel, then, is an integer between 0 and 255.
        var brightness = (3*r+4*g+b)>>>3;
        data[i] = brightness;
        data[i+1] = brightness;
        data[i+2] = brightness;
Here, a quick bit of math converts the RGB value of the pixel into a single “brightness” value. As it turns out, our eyes respond most strongly to green light, slightly less so to red, and much less so to blue. So, I weight the channels appropriately before taking the average. Then, we just feed that single value back to all three channels. As we probably all know, when the red, green, and blue values of a color are equal, you get gray. (During this whole process, I’m completely ignoring the fourth member of each group, the alpha channel, because it’s always going to be 255.)
idata.data = data;
Shove the modified pixel array back into the ImageData object…
c.putImageData(idata,0,0);
…and then shove the whole thing into the visible canvas! We didn’t need to do any complicated drawing at all! Just grab the pixels, manipulate them, and shove them back in. So easy!
A final note: real-time full-video pixel manipulation is one of those rare places where micro-optimizations actually matter. You can see their effects in my code here. Originally, I didn’t pull the pixel data out of the ImageData object, and just wrote “var r = idata.data[i];” and so on each time, which meant several extra property lookups in every iteration of the loop. I also originally just divided the brightness by 8 and floored the value, which is slightly slower than bit-shifting by 3 places. In normal code, these sorts of things are completely insignificant, but when you’re doing them several million times per second (the video is 480×360, and thus contains nearly 200,000 pixels, each of which is individually handled roughly 100 times a second), those tiny delays add up into a noticeable lag.
More advanced pixel manipulation
You can operate on more than just a single pixel at a time, too, composing some fairly complex visual effects. As I noted at the end of the previous section, performance matters a lot here, but you’d be surprised what you can squeeze out with a little creativity. As you can see in the demo, I’ll be creating an emboss effect in this example, which requires you to use several input pixels together to compute the value of each output pixel.
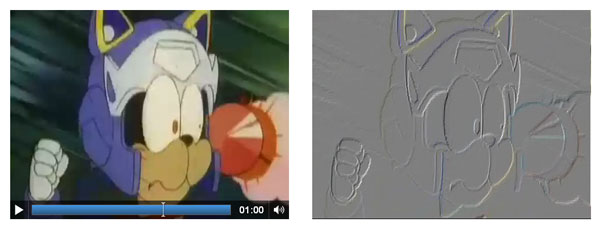
Here’s the code. The HTML and most of the beginning code is identical to the previous example, so I’ve omitted everything but the draw() function:
function draw(v,c,bc,cw,ch) {
    if(v.paused || v.ended) return false;
    // First, draw it into the backing canvas
    bc.drawImage(v,0,0,cw,ch);
    // Grab the pixel data from the backing canvas
    var idata = bc.getImageData(0,0,cw,ch);
    var data = idata.data;
    var w = idata.width;
    var limit = data.length
    // Loop through the subpixels, convoluting each using an edge-detection matrix.
    for(var i = 0; i < limit; i++) {
        if( i%4 == 3 ) continue;
        data[i] = 127 + 2*data[i] - data[i + 4] - data[i + w*4];
    }
    // Draw the pixels onto the visible canvas
    c.putImageData(idata,0,0);
    // Start over!
    setTimeout(draw,20,v,c,bc,cw,ch);
}
Now let’s step through that.
function draw(v,c,bc,cw,ch) {
    if(v.paused || v.ended) return false;
    // First, draw it into the backing canvas
    bc.drawImage(v,0,0,cw,ch);
    // Grab the pixel data from the backing canvas
    var idata = bc.getImageData(0,0,cw,ch);
    var data = idata.data;
Same as the last example. Check to see if we should stop, then draw the video onto the backing canvas and grab the pixel data from it.
var w = idata.width;
The significance of this line needs some explanation. I’m already passing the canvas’s width into the function (as the cw variable), so why am I re-measuring its width here? Well, I was actually lying to you earlier when I explained how large the pixel array will be. The browser might have one pixel of canvas map to one pixel of ImageData, but browsers are allowed to use higher resolutions in the image data, representing each pixel of canvas as a 2×2 block of ImageData pixels, or maybe 3×3, or maybe even greater!
If they use a “high-resolution backing store”, as this is called, it means better display, as aliasing artifacts (jagged edges on diagonal lines) become much smaller and less noticeable. It also means that rather than a 100×100 pixel canvas giving you an ImageData.data object with 40,000 numbers, it might have 160,000 numbers instead. By asking the ImageData for its width and height, we ensure that we loop through the pixel data properly no matter whether the browser uses a low-res or high-res backing store for it.
It’s very important that you use this properly whenever you need the width or height of the data you pulled out as an ImageData object. If too many people screw it up and just use the canvas’s width and height instead, then browsers will be forced to always use a low-res backing store to be compatible with those broken scripts!
    var limit = data.length;
    for(var i = 0; i < limit; i++) {
        if( i%4 == 3 ) continue;
        data[i] = 127 + 2*data[i] - data[i + 4] - data[i + w*4];
    }
I’m grabbing the data’s length and stuffing it into a variable, so I don’t have to pay for a property access on every single iteration of the loop. (Remember, micro-optimizations matter when you’re doing real-time video manipulation!) Then I just loop through the pixels, like I did before. If the pixel happens to be for the alpha channel (every fourth number in the array), I can just skip it — I don’t want to change the transparency. Otherwise, I’ll do a little math to find the difference between the current pixel’s color channel and the similar channels of the pixels below and to the right, then just combine that difference with the “average” gray value of 127. This has the effect of making areas where the pixels are the same color a flat medium gray, but edges where the color suddenly changes will turn either bright or dark.
There’s another optimization here. Because I’m only comparing the current pixel with pixels “further ahead” in the data which I haven’t looked at yet, I can just store the changed value right back in the original data, because nothing will ever look at the current pixel’s data again after this point. This means I don’t have to allocate a big array to hold the results before turning it back into an ImageData object.
    c.putImageData(idata,0,0);
    setTimeout(draw,20,v,c,bc,cw,ch);
Finally, draw the modified ImageData object into the visible canvas, and set up another call to the function in 20 milliseconds. This is the same as the previous example.
Wrapping up
So, we’ve explored the basics of combining HTML5’s <canvas> and <video> elements today. The demos were very basic, but they illustrated all the essential techniques you’ll need to do something even cooler on your own:
- You can draw a video directly onto a canvas.
- When you draw onto a canvas, the browser will automatically scale the image for you if necessary.
- When you display a canvas, the browser will again scale it automatically if the visible size is different from the size of the backing-store.
- You can do direct pixel-level manipulation of a canvas by just grabbing the ImageData, changing it, and drawing it back in.
In Part 2 of this article [Ed: coming soon!], I’ll explore some more interesting applications of video/canvas integration, including a real-time video-to-ASCII converter!
83 Responses on the article “video + canvas = magic”
What is it with people and their short non descriptive variable names :( I understand you do that to keep the size of your code down. But that is rather pointless for example code. Besides that’s what tools like JSlint are for. So can you please use more descriptive var names than ‘c’ or ‘v’ in your code examples next time?
Thanks in advance!
Man I haven’t seen samurai pizza cats in ages – makes this tutorial so much more engaging for me :D
@ysbreker Jesus more descriptive names? If you’re coding a Html5 Video and Canvas implementation, then what do you think the C and V variables stand for? And for the other vars the accessors used to set them pretty much tell you what they are. Meaningful variable names not necessarily mean typing the whole names each and every time. If you can make do with simple letters in scope with good comments, more power to you! Typing less is always a plus.
Anyways, great article Tab, you made me want to take out my Html video hat and Javascript robe (am I a wizard?) and start making something of this!
@ysbreker In general, I agree with you. Note that, for example, I use variable names like “canvas” and “backcontext” in the global scope. It’s really only in the functions that I use short names, and that’s because the functions are short and simple, and it’s obvious what they refer to. I don’t do this to make my code shorter (and I don’t generally like minifiers at all); I do it because that’s all the detail that is needed at that point. Shorter expressions fit in my head better.
In other words, I like my variable names to be as long as necessary, but no longer. Your taste may vary. In a longer program I wouldn’t have used “v”, “cw”, or “ch” in the global scope.
@dijama Hah, glad you liked it! Samurai Pizza Cats was *so good*.
@Jaime Excellent, that’s precisely the reaction this was supposed to elicit. This kind of hacking is both super-cool and super-simple, but people just don’t know about it! There will be more of this sort of thing in the future; it’s astonishing what you can do with a modicum of effort now. The web is so much easier to work with than the desktop.
setTimeout(function(){ draw(v,c,bc,w,h); }, 0);
This looks like a bad idea :)
In general it just sucks that there’s no way of knowing when there’s a new frame to paint…
Wow. How long until these kinds of effects become presets in some newfangled HTML5 IDE?
Thanks for these great demos. Nice to see that 2 of the most interesting, and hopefully useful elements can be used together so nicely.
Also, I totally forgot about Samurai Pizza Cats – awesome!
you can do all these kinds of things for years with flash.
there are lots of flash filters for manipulating content.
it’s nice that you can do it with javascript and html5 too now,
but in fact it’s nothing new. you can now choose between js and as.
for real good animating you need a decent gui. flash ide is exactly that,
a browser isn’t.
In the first code listing you call draw(this,context,cw,ch); while when you pull it out further down in the explanation you call draw(v,context,cw,ch);.
That threw me for a bit of a loop, a mistake perhaps?
@Philip Heh, yeah. I should be using a timeout of 20 or so, actually. I luckily get rate-limited to about that anyway. Moz has an experimental API to listen for repaints (sorta); I should check that out and give some feedback.
@Mike Indeed, a lot of HTML5’s new flash is just pulling things into the client that you had to use plugins for before. My point with this article, though, was to show how amazingly easy it is to do in HTML5, because the APIs are designed decently. I’ve wanted to do video and picture manipulation before, but I’d never gone to the effort of installing some Flash IDE and learning ActionScript and all that. It’s just too much work. In HTML5, though, all you need is a text editor, a browser, and ten minutes and you can do whatever you want.
@wds Not a mistake, but maybe not completely obvious if you don’t know the ins and outs of javascript. When draw() is first called, it’s within the context of the v.addEventListener() callback. Inside that function, the ‘this’ variable is bound to ‘v’ – the video. In the draw() function itself, I have to explicitly use ‘v’, because the ‘this’ variable is bound to something different there. (If you didn’t know, ‘this’ is a magic variable in javascript, which is bound to different things based on where it’s used.)
Awesome article!
But, one question: Why don’t you use setInterval? It’s better, isn’t it?
Not quite. setInterval() is better if you know for a fact that your function will run in less time than the interval you’ve set. I don’t quite know that with a lot of the video-editting stuff – if your computer’s a little slow, it can easily take more than 20 milliseconds to process a frame. Using setTimeout() means that when this happens, the next frame won’t start to process until the current one is done.
Nice article, but it is only working in firefox latest version. We know ofcours that IE is not that browser to work with, so it is not working there. But in safari you only see the video, no canvas. and the browser opera is showning nothing. I don’t test it in chrome.
Seems to me you need a little more code here so it is working then in al browsers.
@Gunther It works fine in Opera, as far as I can tell. It does indeed fail in Safari, and I’m not sure why – no errors are being thrown. I’ll investigate it.
These demos don’t seem to work for me in Safari 5.0.2 on Windows.
Is it just me or are they incompatible?
Thanks-
“integration between the element and the element, which you can’t achieve with a Flash player”
Hiding something? Flash has a full-featured API for video, bitmap, effects, filters etc, and lot of fast effects that you don’t need to code manually plus an optimized pixel engine for custom filters. Cross-browser and no need of duplicate content. Hardware-acc 3D waiting around the corner.
It’s nice that you test the limits with HTML5/Canvas but hardly can’t start before the problems appear, quite tough work isn’t it. I have forgot why Steve preferred HTML5 over Flash.
@Tomas: You misread my sentence. I’m talking about the API designed to let you combine the video and canvas element easily. You can’t easily combine a flash player with canvas.
I’m quite aware of Flash’s native abilities to do image manipulation. Canvas still exists in a very basic state right now, but will be picking up similar capabilities in the near future. For example, the 3d canvas context powered by webgl is currently available in Firefox and Chrome betas, and will soon be available publicly in both.
I recommend you read more closely next time before unleashing any misguided hostility.
Amazing tutorial thank you
Good showcase of HTML5
I work on both Flash and html5 project for a while now. I see why people think html5 is not the right tool for animation with all the complex features flash have now. I do like to have more tools than just flash when I need some simple animation though, it just seems overkilled to use flash sometime. More options is always a good thing.
Thanks for the samples.
Hi Tab,
Thank you for this great article. But could you explain why a local copy of the demo’s do not work while
the online demo’s work fine on FF 4 beta 8 ?
I copy pasted the code, no type errors.
Is this the way this works ? Does it need http?
Thanks,
Xander
@Xander: If you try and run it locally, then the video is grabbed from a file:// URL. For security reasons, you are very limited in what you can do with those kinds of URLs. In Chrome, file:// URLs are always cross-origin, even if the page is also loaded from a file:// URL in the same folder. Other browsers have similar behavior.
If the video is cross-origin, then painting it into the canvas “taints” the canvas. You aren’t allowed to grab pixel data from a tainted canvas, again for security reasons.
You don’t necessarily have to put the files online for this to work, they just have to be served from an actual server. If you run PHP or nodeJS from your desktop and access the files through that, it’ll work fine.
Hi Tab,
I really enjoyed your code and explanations! It all seemed to work very well in Safari 5.0.3 and Chrome 8.0.x on my Mac. In Opera (10.63), the problem with demo1 was that the controls didn’t show unless the cursor was inside the video; demo2 and demo4 worked fine. I’ll look out for Part 2 of this article. ;-)
One more observation:
With Safari 5.0.3 on my Mac I could actually run demo2 directly from my own local disk, and I guess the other demos would have worked also. file: URLs obviously don’t count as “cross-origin” in Safari. ;-) The other browsers that I tried did not allow it.
Hi,
There’s a bad link in the upper part of this page: http://html5doctor/the-video-element
It should have a .com, like this: html5doctor.com/the-video-element/
I try to get my head around the edge detection line.
data[i] = 127 + 2*data[i] - data[i + 4] - data[i + w*4];
So let me see if everything went into my head correctly:
The first variable your are stuffing this Information into is an array with all the values in it.
No Problem with that.
The 127 for the gray are making sence aswell.
Then you double the value of the current pixel because you are subtracting 2 values representing 2 other parts of the image there.
The first subtracting pixel is 4 values next to the current one which means it is the very next pixel to the right.
The other on is the one below. Allright then, but why are the top edges of the a surface dark, and below white?
I know this is in all in this line of code above.
But can someone give me a hint, its like I see the pixel but not hole image.
What am I missing?
THX.
all demos (except first) crashed in IE9 beta,
can it be solved?
or IE9 simlpy doesn’t support this video+canvas combination?
ok, then I answer my question,
so have to knead the code a bit, but after that demos will work with IE9 too
This is a great tutorial.
I’m preparing a project for HTML5 Video and Canvas and all this is still very new to me. I am interested in what was mentioned with cross-origin files and the “tainted” canvas, because I think it might have something to do with why one of my other experiments that I derived from a tutorial keeps failing. Googling didn’t really get me anywhere yet. Does anybody have some more information on this?
Hi,
The problem I am having is the following:
I use a video and a canvas tag and capture a frame from the video tag and place it into the canvas tag, but when I create a reference of the canvas in javascript so that I may return the dataURL it bombs out.
Here is the code I use to place the frame from the video:
_________________________________________________________________
var video = document.getElementById(“video”);
var canvasDraw = document.getElementById(‘imageView’);
var w = canvasDraw.width;
var h = canvasDraw.height;
var ctxDraw = canvasDraw.getContext(’2d’);
ctxDraw.clearRect(0, 0, w, h);
ctxDraw.clearRect(0, 0, w, h);
ctxDraw.drawImage(video, 0, 0, w, h);
_________________________________________________________________
The above works perfectly.
Below is the code to get the dataURL:
_________________________________________________________________
function getURIformcanvas() {
var ImageURItoShow = “”;
var canvasFromVideo = document.getElementById(“imageView”);
if (canvasFromVideo.getContext) {
var ctx = canvasFromVideo.getContext(“2d”); // Get the context for the canvas.
var ImageURItoShow = canvasFromVideo.toDataURL(“image/png”); //<– It fails on this line.
}
var doc = document.getElementById("txtUriShow");
doc.value = ImageURItoShow;
}
_______________________________________________________________
It always fails on the line:
var ImageURItoShow = canvasFromVideo.toDataURL("image/png");
Any thought on what might be the problem. If I load a normal image into the canvas it works fine, but as soon as I load the image from video into the canvas that line fails.
Any ideas?
JavaScript is still the ugliest, most convoluted-looking slop to exist in the world. Type once and if it works, enjoy, because in the future when trying to update or maintain it… forget it. Typing a new script with a fresh mind is always faster.
I gave up years ago on the concept of developing web apps BECAUSE of js. What I can’t do with straight HTML/CSS/PHP/SQL/SSL – I simply won’t do it.
I’ve dabbled enough into assembler language for low-level use on systems, and even that makes more sense to me than js. Even created my own simple i/o stream library in straight assembler.
My little secret: I appreciate and enjoy assembly way more than js, even though I do understand the two are meant for entirely different purposes. The point is… js is very ugly, convoluted and horrific to maintain. Ooops, guess I already said that. Did I say js is ugly and convoluted… ahh yes… I did.
If js looks ugly and convoluted to even someone who has worked with assember (using both MASM and NASM)… that speaks volumes.
It’s a shame js has been left to be the only cross-platform client-side “language”, if you even want to call it that.
What amazes me is how so many people say “Oooh you mess with assembler coding? You must be a master mathematician to understand that stuff.” I tell them that all one needs to program in assembler is the ability to break down an abstract idea (a computer unit) into it’s most fundamental aspects, and to then manipulate those aspects in the form of bits, bytes, dwords, etc., and to then let the computer processor worry about the x,y math since that is what it was designed to do.
Then I tell them…. I leave javascript to those who like math, because they need to develop formulas and algorithms in their heads JUST to decode their scripts at a later date… weeks or months down the road. LOL
Nice tutorial man. This is true js wizardry.
I followed your code and achieved some nice results. I’m thinking of a project that uses this technique but I would really like to make it work on the iPad too. So far I have had no such luck.
Do you know if it is possible to draw video frames on a canvas element on the iPad’s browser?
I’d like to note that your technique works flawlessly in the new Mobile Firefox browser on my Android.
@Cristian: I have no idea why this *wouldn’t* work on the iPad browser. Sorry, I don’t have one to test with. Glad to hear it works great on Mobile Firefox, though!
Hi Tab, I’m wondering if you might know why I’m experiencing issues with Safari on Mac (and some instance of the PC version), but the video -> canvas seems to work great in FF and Chrome? I’m at a loss.
I believe I’ve followed your tutorial properly. The goal is to get this video to play in the background of: http://eandv.dev01.atlanticbt.net/ . Currently Safari just displays the JPG I have in the background.
Thanks,
Mark
@Mark Caron, I recall reading somewhere that for the video tag to work properly you have to put the mp4 first in the sources list. Have you tried this?
Thanks @Christian. I did try that and unfortunately it didn’t work. I had the thought to try the videos from this demo just to see if it happened to be a corruption of my mp4 file (although it does play by itself in the browser) and all of them worked! But, just not my mp4 file when it’s used in the video element. So I don’t think it’s my code…I don’t think…
So, I’m going to try an re-convert all the video files (I didn’t do the first conversion–came from someone else). Unless someone has a better idea…I’m all ears…
Is there a way, when I hit pause, to create a jpg. I’d like to post the paused frame up to my server for saving, for some other magic work. Basically I want an image of the paused frame pushed via ajax (jquery) to a script on the server where I could save the file.
Anyone know of a way to do this?
@bob: Sure, just draw the video into the canvas, like normal, then call either toDataURL() or toBlob() on the canvas, then send the data back to your server. The exact route you take depends on the browsers you’re targetting. I think right now it’s safest to to toDataURL, send the string over to your server, then decode it on the serverside into an actual file.
I’d just like to add something regarding variable name size. I don’t always start reading code at the top. I may start in the middle or the end. More descriptive names facilitate this better as I may not have seen the initial assignment yet.
Hi. For iPhone/iPad compatibility with your demos, what about trying the information on this link?
http://stackoverflow.com/questions/3699552/html5-inline-video-on-iphone-vs-ipad-browser
This article and demo are very interesting.
It would be very nice to extend these demos by adding a sample that use Canvas over Video to make Hyper Video to allow inserting clicable hotspot inside the video that.
The idea is to sync with time ou frame number and exploit metadata information to change location, size of clicable hotspot.
The real challenge is to find an authoring tool to produce these meta-data in an intelligent way to deal with camera zoom and object tracking movement and trajectory interpolation :-)…
None of this works at all.
None of the demos, and nothing I’ve tried myself.
Why are you at Google so damned incompetent when it comes to software engineering? You just pitch garbage over the wall and call it a standard after the fact.
WebSQL, webGL.. These aren’t standards, the way you guys develop software drives deep into professional malpractice territory.
why this demo is not working on my iPad ????… version 5.0
This video tutorial looks really great.when I saw these demos, can we have 3d steroscopic video as well by directly manipulating the pixel content?
Awesome tutorial – Thanks!
That is a great tutorial, thank you! Just what I was looking for. I’m working on a website for an artist friend and we have been wondering what more interesting use we could make of his video work – this is just the sort of thing we were looking for. Very inventive.
hi
this looks all promissing, thanks for sharing.
i do want exaclty this on a blog, BUT the source of the video would be youtube, vimeo, etc.
so that anybody could post a video and this one gets converted into grayscale.
so my question is: this doesnt work due to security reason, right?
no js on external video sources, right?
Correct. Specifically, a cross-domain video will taint the canvas, so you can’t go in and mess with the pixels afterward.
If the other site sends the appropriate CORS headers, this won’t happen, but I doubt that Youtube will be happy to have people embedding their videos directly.
Shouldn’t attribute values containing a slash be quoted, pedanticly speaking?
No, not particularly. The only thing that requires quoting is whitespace in the value, or any of the three quote marks at the start of the value. (The backtick ` is counted as a quote mark for legacy compat with an old IE bug.)
Yeah!! Samurai Pizza Cats!!!
Amazing article.
Is there a possibility to manipulate the video in canvas to play a series of different videos? For example, when one video finishes automatically start the next video in queue without the user knowing?
Pretty useless tutorials, none of them work, even using a direct copy of the source code.
Try reading the article again, particularly the paragraph starting with “Warning!”, where it explains why the examples might not work if you copy them onto your own computer, and how to fix it.
@BiosNova RTFM
@Tab Atkins
Hey man thanks for that, i’am experimenting with 3d Canvas and wanted to render a video on a animated cube,
It’s easyer as i thougth … canvas is soo cool stuff
I got it to work in IE9 (Internet Explorer 9) by changing
setTimeout(draw,20,v,c,bc,cw,ch);tosetTimeout(function(){ draw(v,c,bc,cw,ch)},20);Erm, where are you speech marks around the attributes in your HTML code? That’s right, they’re not there.
Congratulations for discovering that. You’re the best. What’s your point?
Thanks, I went through the whole demo just because of the Samurai Pizza Cats.
i am getting “tainted canvas” errors even though my video is on the same server as the html page. and this only happens on mobile devices (iPad) not on a desktop. anybody have any idea why and how to fix it?
Hi Tab.
I’m seeing the same issue as Dane when running this on Android smartphones, tablets or on the iPad. Specifically Android throws this error through logcat:
Uncaught Error: SECURITY_ERR: DOM Exception 18 http://html5doctor.com/demos/video-canvas-magic/demo2.html:30
This isn’t supposed to happen, since the HTML is on the same domain as the video, yet it still does. Any idea why this is happening?
Please, someone add these effects to a web player. They will help so much in discovering fake (CG) videos!
Lol. Do you get fooled a lot by them fake CG’zez? They took urr jobs! haha
Hey Tab,
Have you looked in to requestAnimationFrame?
I had read about it a while ago and was trying to remember it after reading this article the other day.
For anyone interested it is a alternate timer to replace setInterval, Where setInterval just loops every n’millisecons. The requestAnimationFrame is synced to the browser refresh rate. It means that the speed of your animation is optimised to the speed of your browser.
Well anyway just thought that you might be interested.
Yup, I definitely know about rAF! At the time I wrote this post, it wasn’t widely implemented.
An important point, though – rAF is *not* similar to setInterval. Instead, it’s similar to setTimeout – when you set something up with rAF it gets called *once*, and you have to manually call rAF again. This is intentional, because it has a better failure mode: if something goes wrong, the animation will just stop, while if it automatically kept calling itself, it would continue spinning the CPU and wasting battery life.
`This code is giving error for when for second time draw(v, c, w, h) the V,C are rendered as undefined.
Hello Tab
I was wondering if there was a way to export a canvas animation as video data. is this possible with the current canvas spec?
There is no way to export a canvas as a video. For one thing, browsers don’t have video encoders built in and probably never would – that would be a lot of extra megabytes to ship to billions of people, most of whom will never want to do it.
Larry, it work i was able to create arc on canvas for 150 FOR loop for each loop would call a new function which uses xhr2 to post each it as dataurl then to png on server using php to store as sequence png file.
Latter call play the 150 png file as video using virtualdub.org
it work as the first canvas run 150 FOR loop arc created at random
need info please ping me on ralphsubramanyam @ gma .co
Hello ralphin,
I sent you an Email asking how you was able to accomplish the task of exporting canvas data as video on a webpage. What i am trying to do is have image data from a canvas exported as a sequence and then reconstructed to video data. Any help will be appreciated guys.
hey i want to both above first n second example implement.
when i use both example with one code then the canvas image is not printed .
I want to make a canvas to video size, just like the second demo but
not in black and white.
can anyone help me ????????
Wonderful stuff. My only question is can we then draw *other* things – and have clickable interactivity – on the canvas?
If so then I’ll probably start making Night Trap (http://en.wikipedia.org/wiki/Night_Trap) but in the browser LOL.
+1 for not using jQuery too :-)
This is what you get when I’m asked to create an HTML5 compliant thumbnail overlay box to display fullsized images. And, you won’t have to worry about watching it again because it’s stuck on forever repeating.
@Daniel
Yes indeed, you can draw whatever you want on the canvas and have a clickable interactivity if you keep track of the position of what you placed to know which object has been clicked.
This is what we do at ivotek.com
I think it is better to use
requestAnimationFrameinstead ofsetTimeout. BecauserequestAnimationFramesyncs with the browser refresh rate.I’m currently using requestAnimationFrame for a camera app that I’m making. Manipulating the pixels of the canvas is really intense on the CPU however.
Are there any articles on how to OPTIMIZE something like this? A web worker perhaps? I’m not sure. I’d just like to make an HTML5 Photobooth app that doesn’t crash on my single core Android phone.
Hi, great article, but i have tested your code with my video or even your video. The canvas could not draw it out, why is that happening?
Hi really nice work.
One question
How make to draw a square in the video, I thing with two canvas, but after is possible only showing the canvas?
Sorry I make que question very fast… I try to showing a rectangle in the video for marked a special part, well the response is:
#videocontainer {
position: relative;
}
#video {
position: absolute;
top: 0;
left: 0;
}
#myCanvas {
position: absolute;
top: 200px;
left: 250px;
border:2px solid #FF0000;
z-index: 10;
}
Your browser does not support the HTML5 canvas tag.
div id=”videocontainer”
video id=”video” width=”640″ height=”480″ autoplay
/video
canvas id=”myCanvas” width=”220″ height=”60″
/canvas
/div
Need little help:( im beginer and i got a problem. When i try to “Directly manipulating video pixels” i put the code but when i refresh the page and press play btton the canvas dosent work:( it dont even show.. can anyone help me pls?
Imagine a vendor accepting every major currency except that of the United States. So, they only accept major currencies, no minor ones, with the exception of the most used or nearly the most used currency on the planet. That’s a show stopper that renders the service useless in general. Likewise, if you have no control over what browser people use, but you can’t provide a solution that works with the #1 or #2 browser, you don’t have a solution. Needless to say this is Microsoft’s fault, but it’s everybody else’s problem .
@ysbreker, @jaime I have to agree here with ysbreker. I understand your point of view with the short variable names, but in this example it wasn’t that obvious to me, since I’m new to html video and canvas. At a glance it was actually rather confusing looking at the method definition with a parameter list that looks like this ‘v,c,bc,w,h’. It is very rarely a good idea for this level of brevity except for a few standards such as w,h,n(counter). Apart from that it is always possible to confuse unless you only have one or max two variables in scope. For an example such as this, better to always use longer names.
Leave a Reply to JC